Group VS Assembly


What is a Group & Assembly?

Both are collections of multiple Revit elements in one.

What is the difference?

1. Purpose of Use

Assembly is useful for producing detailed drawings or shop drawings enabling construction workflows. Basically, it is a part of the Revit project which gets built separately or wants to represent as a separate segment.

Whereas Group is useful when we have repetitive elements or layout.

2. Elements

Assembly cannot be created containing rooms, annotation, and detail items.
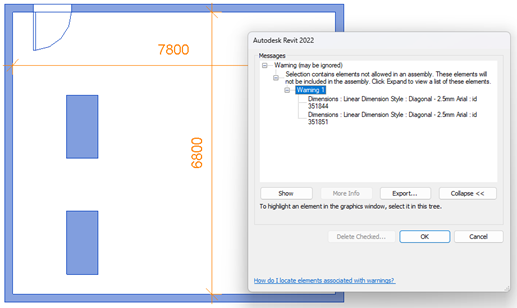
Assembly – Element

Whereas Group can be created containing rooms, annotation & detail items. (Model Group, Detail Group)
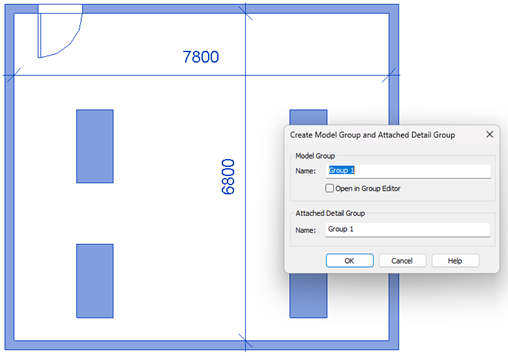
Group – Element

3. Separate Set of Views

Assembly provides a function to create a different set of views (Floor Plans / Ceiling Plans/ Elevation/ Section/ 3D Views/ Schedule) just containing that assembly.
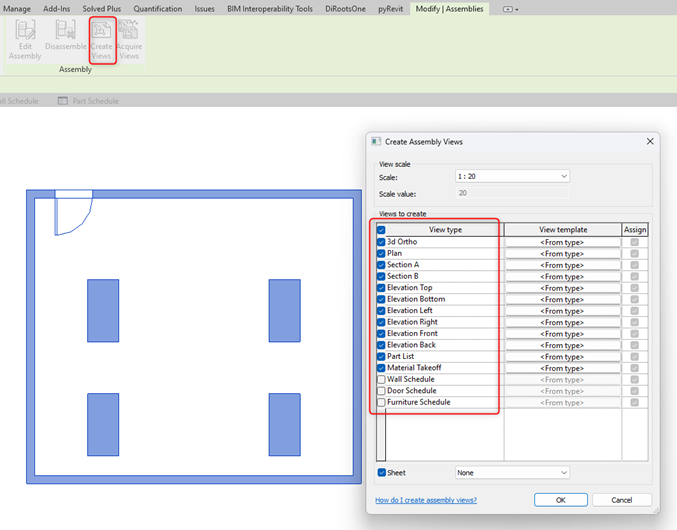
Assembly – Separate Views

Whereas Group does not have a such function of creating a separate set of views just for the group.
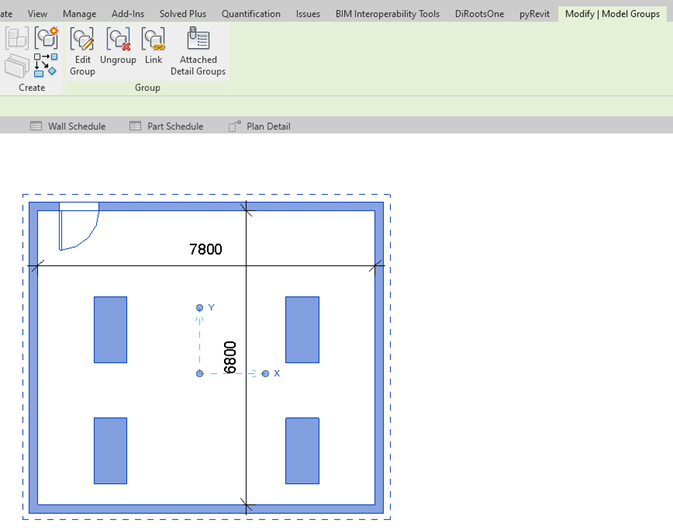
Group – Separate Views

4. Editing Capabilities

Assembly when edited creates a separate assembly it doesn’t make changes in similar assemblies in the project. This means when the assembly is created design must be completed.

Assembly – Before Editing
Assembly – After Editing

Whereas when edits are made inside a group do not create a separate group instead it updates all the similar groups in the project.

Group – Before Editing
Group – After Editing

5. Exclusion of Elements

Assembly does not have a separate function of exclusion, unlike Groups.

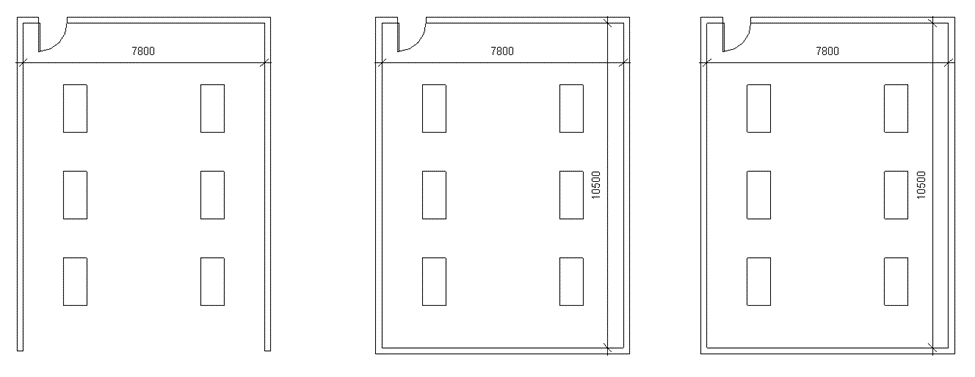
Whereas in a Group when a single element of a group is excluded it doesn’t make changes in similar groups. It also has the option of restoring all excluded elements in a group. It provides more flexibility in terms of making changes in a group
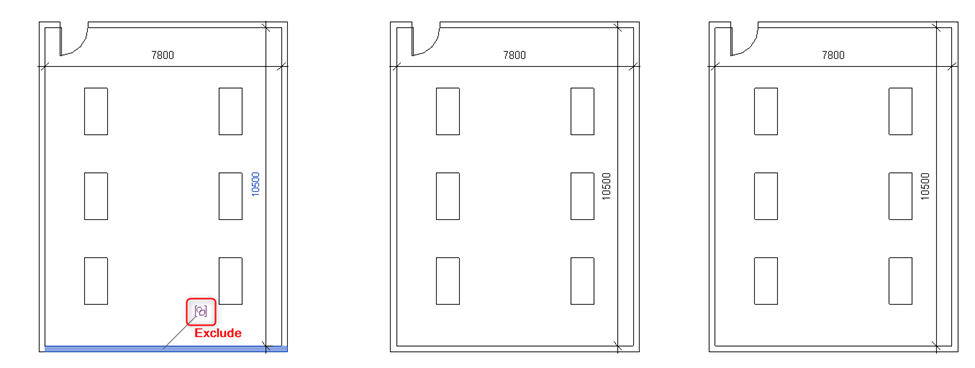
Group – Before Excluding Element
Group – After Excluding Element (Wall)

6. Deletion

When a particular assembly is deleted in a view it completely gets deleted from the project.

Whereas when a Group is deleted in a view it remains in the project and can be used later to place back in the project.

7. Separate Revit Link

Assembly cannot be created as a separate link.

Whereas Group can be converted into a separate Revit Project and linked into the current file as a Revit Link.
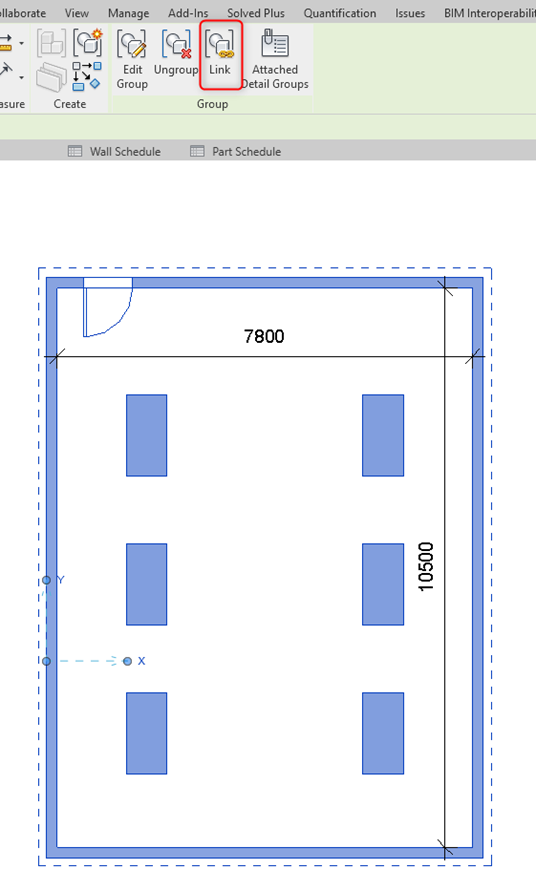
Group – Separate Revit Link

Summary

Can include multiple ElementsSeparate ViewsFlexibility to EditCan include RoomsCan include Annotation/Detail ItemCan include Design OptionExclude certain element
GROUPYesNoYesYesYesYesYes
ASSEMBLYYesYesNoNoNoNoNo
Group vs Assembly

Understanding Revit Parameters


What is a Parameter?

Parameters are properties of an element that shows and controls the element’s information.

Types of Parameter

  • INSTANCE PARAMETER
  • TYPE PARAMETER
  • PROJECT PARAMETER
  • SHARED PARAMETER
  • GLOBAL PARAMETER

Instance Parameter

To understand these parameters first understand the term “Instance” which means a single occurrence of something.

Therefore, an instance parameter means a parameter of an element that can be modified for each element/instance.

The parameters which appear on the properties tab (outside) of every element are instance parameters.

Properties Dialog Box (Example: Wall Properties)

Type Parameter

The term “Type” means a category of people or things having common characteristics.

Therefore, type parameter means a parameter of the type of element which can be modified across all types of elements. It is not instance based.

The parameters which appear after clicking “Edit Type” on the properties tab of the element are type parameters

Properties Dialog Box > Edit Type (Example: Wall Properties)

Project Parameter

The word Project stands for “Entire Model” in Revit Terminology.

Therefore, these parameters are for the “Entire Project” and are not specific to a single element or family type. Project Parameters are for entire categories or categories of elements.

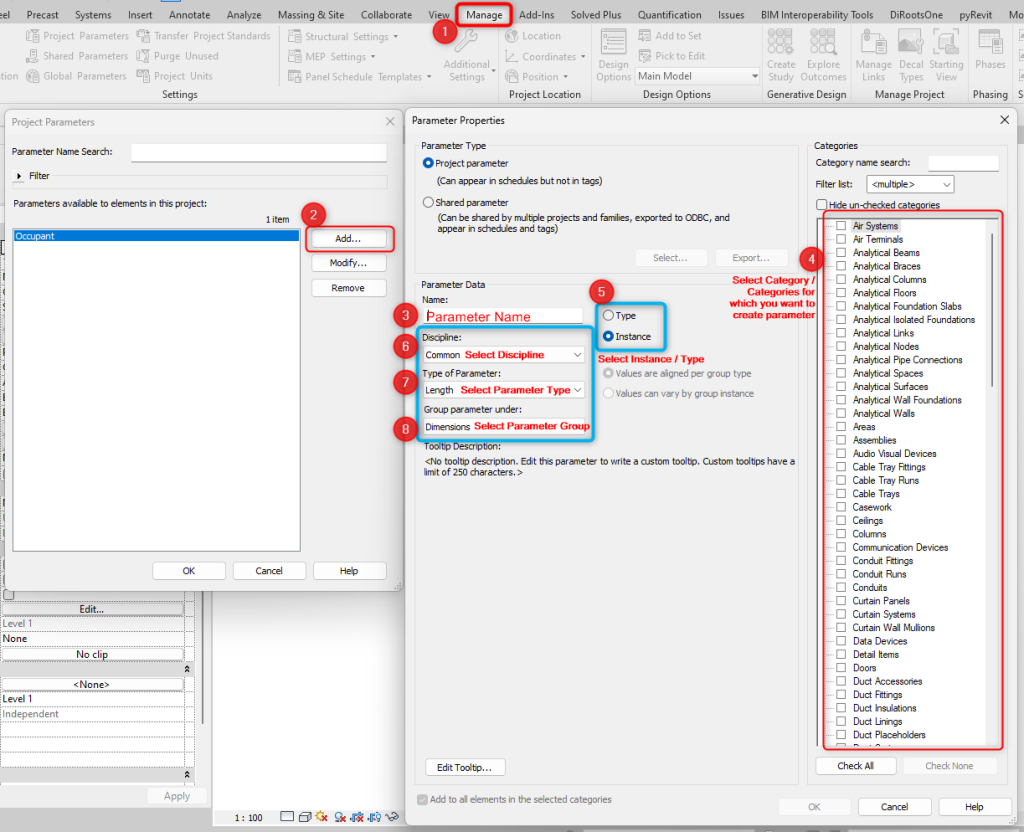
Project Parameters can be Instance Parameters or Type parameters. So, depending on its application it can be defined which one is appropriate.

Project Parameters can only be scheduled it cannot be used to create a tag.

If Shared Project Parameter is created, then those parameters can be scheduled and can be used to create a tag as well.

Manage Tab > Project Parameters

Family Parameter

The word Family stands for .rfa files in Revit Environment.

Hence, these parameters are for a particular family which is created when creating a parametric family enabling it to flex.

Family Parameters can be Instance Parameters or Type parameters. So, depending on its application it can be defined which one is appropriate.

These parameters cannot be scheduled, nor can be used to create a tag unless those are created as Family Shared Parameter.

Shared Parameter

Shared Parameters are parameters that can be “Shared” across multiple projects/families.

Shared Project Parameters or Shared Family Parameters enable it to be scheduled as well to create a tag.

It ensures uniformity of parameter name, parameter discipline & type of parameter (text, number, length, integer, etc.) when used across multiple projects/families.

Manage Tab > Shared Parameters

Global Parameter

Global Parameters are parameters that are not defined to any element/type or category.

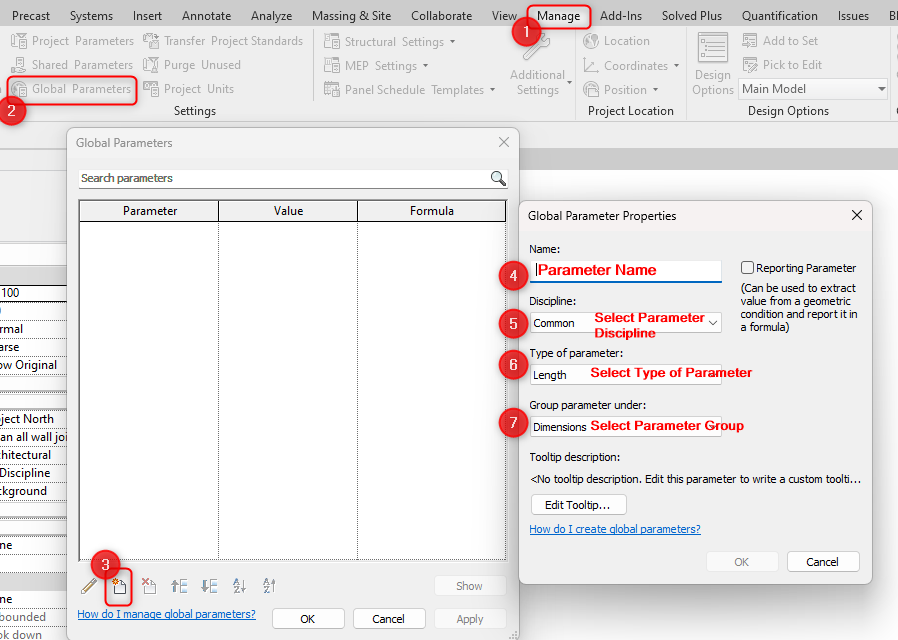
It is used to control geometry by building relationships between different elements. Also, it can be used to create complex parametric relationships between elements by using formulas in global parameters.

Manage Tab > Global Parameters

Hence, it is very essential to understand which parameter must be created for what requirement.

Example:

You have a box family. And the box is placed 10 times in a project. For 5 instances length is 2000, and for the other 5 instances it’s 1500 mm; the width is 5000 mm for all 10 instances whereas height is varying for each instance from 200, 300, 400, 500, 600, 700, 800, 900, 900, and 1000 mm respectively;

Height is varying for each instance then create that as an instance family parameter.

Width is constant throughout 10 instances, create width as a type family parameter.

Since element length has only two varying values, create it as a type family parameter. Also, create 2 types in the family with different length parameter values.

If the above parameters are required to be scheduled/tagged then create those as shared family parameters.