Group VS Assembly


What is a Group & Assembly?

Both are collections of multiple Revit elements in one.

What is the difference?

1. Purpose of Use

Assembly is useful for producing detailed drawings or shop drawings enabling construction workflows. Basically, it is a part of the Revit project which gets built separately or wants to represent as a separate segment.

Whereas Group is useful when we have repetitive elements or layout.

2. Elements

Assembly cannot be created containing rooms, annotation, and detail items.
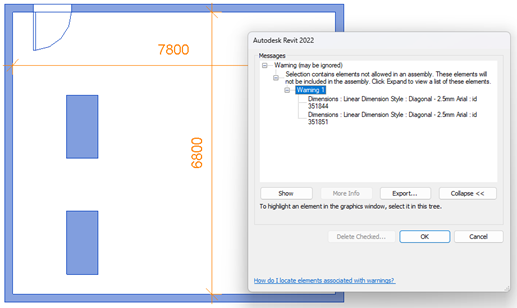
Assembly – Element

Whereas Group can be created containing rooms, annotation & detail items. (Model Group, Detail Group)
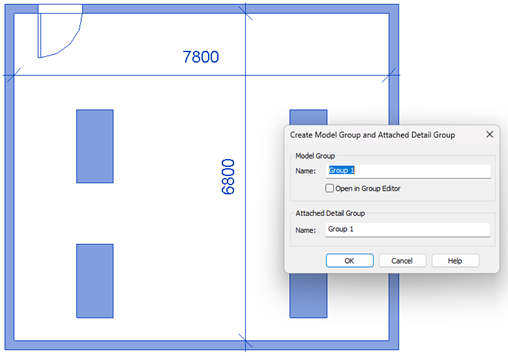
Group – Element

3. Separate Set of Views

Assembly provides a function to create a different set of views (Floor Plans / Ceiling Plans/ Elevation/ Section/ 3D Views/ Schedule) just containing that assembly.
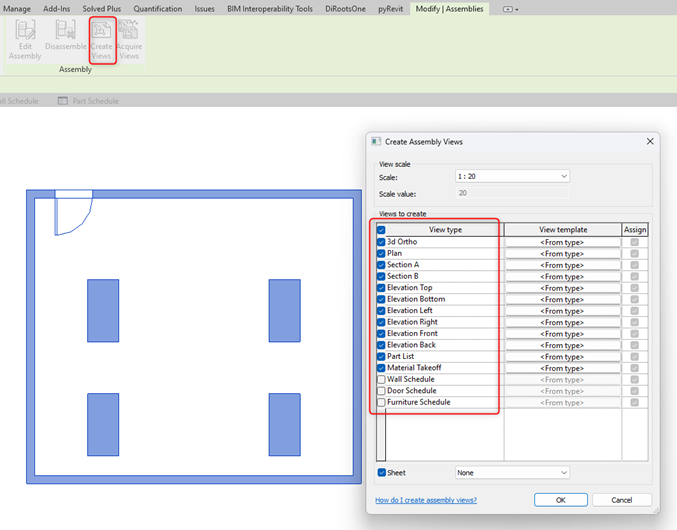
Assembly – Separate Views

Whereas Group does not have a such function of creating a separate set of views just for the group.
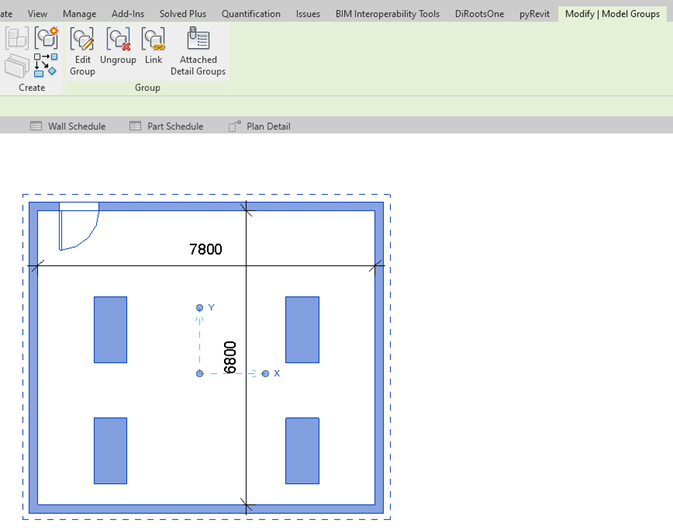
Group – Separate Views

4. Editing Capabilities

Assembly when edited creates a separate assembly it doesn’t make changes in similar assemblies in the project. This means when the assembly is created design must be completed.

Assembly – Before Editing
Assembly – After Editing

Whereas when edits are made inside a group do not create a separate group instead it updates all the similar groups in the project.

Group – Before Editing
Group – After Editing

5. Exclusion of Elements

Assembly does not have a separate function of exclusion, unlike Groups.

Whereas in a Group when a single element of a group is excluded it doesn’t make changes in similar groups. It also has the option of restoring all excluded elements in a group. It provides more flexibility in terms of making changes in a group
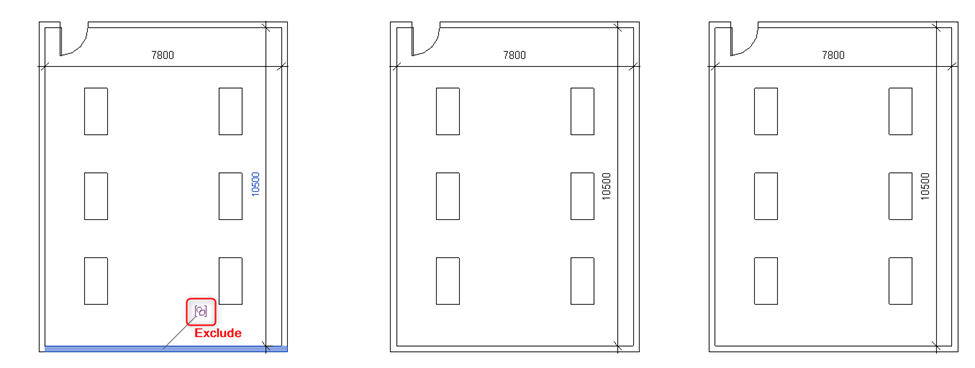
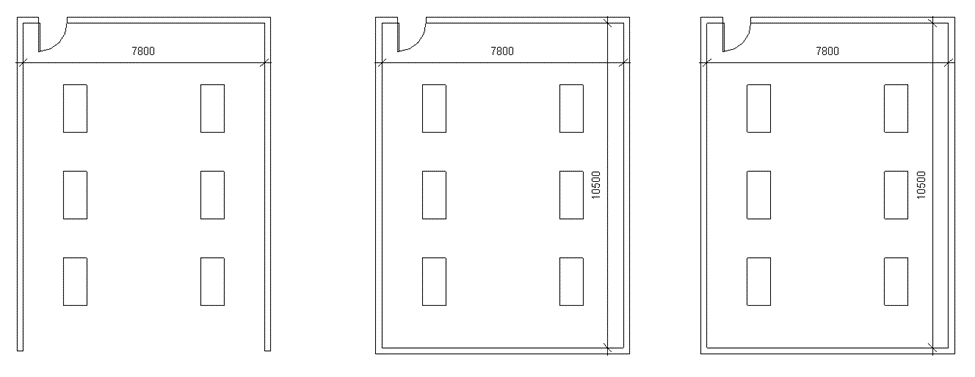
Group – Before Excluding Element
Group – After Excluding Element (Wall)

6. Deletion

When a particular assembly is deleted in a view it completely gets deleted from the project.

Whereas when a Group is deleted in a view it remains in the project and can be used later to place back in the project.

7. Separate Revit Link

Assembly cannot be created as a separate link.

Whereas Group can be converted into a separate Revit Project and linked into the current file as a Revit Link.
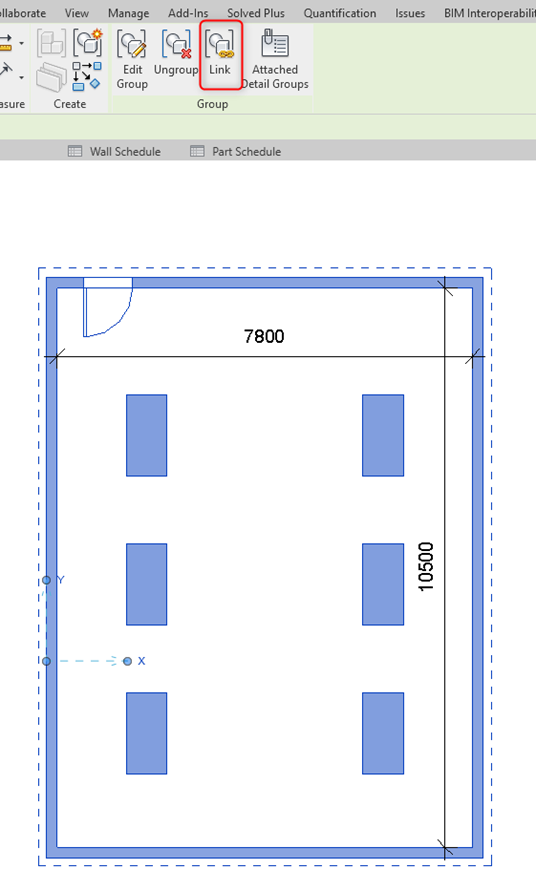
Group – Separate Revit Link

Summary

Can include multiple ElementsSeparate ViewsFlexibility to EditCan include RoomsCan include Annotation/Detail ItemCan include Design OptionExclude certain element
GROUPYesNoYesYesYesYesYes
ASSEMBLYYesYesNoNoNoNoNo
Group vs Assembly

Worksets


To understand worksets it’s essential to understand their role.

A Workset is used in a Revit Workshared Model.

What is a Workshared Model?

The workshared model is a Model where many team members can collaboratively work on the same model at the same time.

Purpose of Workset

As multiple users will be working on the same model it is essential to divide the project elements within parts so that the entire model can be editable by all users,

When a particular workset is made editable the ownership of that workset (containing all elements within it) will be given to that user while working.

No two users can edit elements of the same workset at the same time.

Workset Segregation

To achieve better collaboration, elements are segregated in the worksets depending on what is the role of different members in modeling.

Workset can be made in terms of functional areas of the project if team member work is divided as per functional areas or Worksets can be made in terms of the category of elements if team member work is divided as per the category of elements (Doors, Windows, Walls, Ducts, Piping, etc.)

Benefits of Worksets

Collaborative Working

It provides convenience for editing the project when multiple users are working together.

Visibility

It can also be used to control visibility. The workset can be turned off in a view when not desired. Also, filters can be created using workset.

Faster Opening of Model

If a model must be opened just for viewing/checking the purpose some worksets can be put off to open the model faster.


Essential Points while Segregating Workset

1. All Levels & Grids must be in the same workset in “Shared Levels & Grids.”

2. Every Revit Link must be in a separate workset with a proper naming as “+Link_LinkFileName”

3. And each workset must have a prefix of Discipline Code – “A_” for Architecture; “M_” for Mechanical and so on.


Workset Creation

1. Click Collaborate tab > Worksets (Manage Collaboration panel)

2. In the Worksets dialog, click New.

3. In the New Workset dialog, enter a name for the new workset.

4. To display the workset in all project views, select Visible in all views.

Clear this option if you want the workset to display only in views where you specifically turn on its visibility.

You can change the visibility of worksets later in the Visibility/Graphics dialog.

5. Click OK > Close the Worksets dialog.

When a new workset is created it prompts you to make the new workset active. Click Yes or No depending on use.

Manage Revit Link Worksets

1.Click Manage Tab > Manage Link (Mange Project panel)

2. Select Revit Link for which you want to edit a workset visibility

3. Click Manage Worksets

4. Select Worksets you want to close/open from Revit Link to make it visible/hidden in your current project.

5. Click Reload > Click Ok


Benefits


1. Visualization

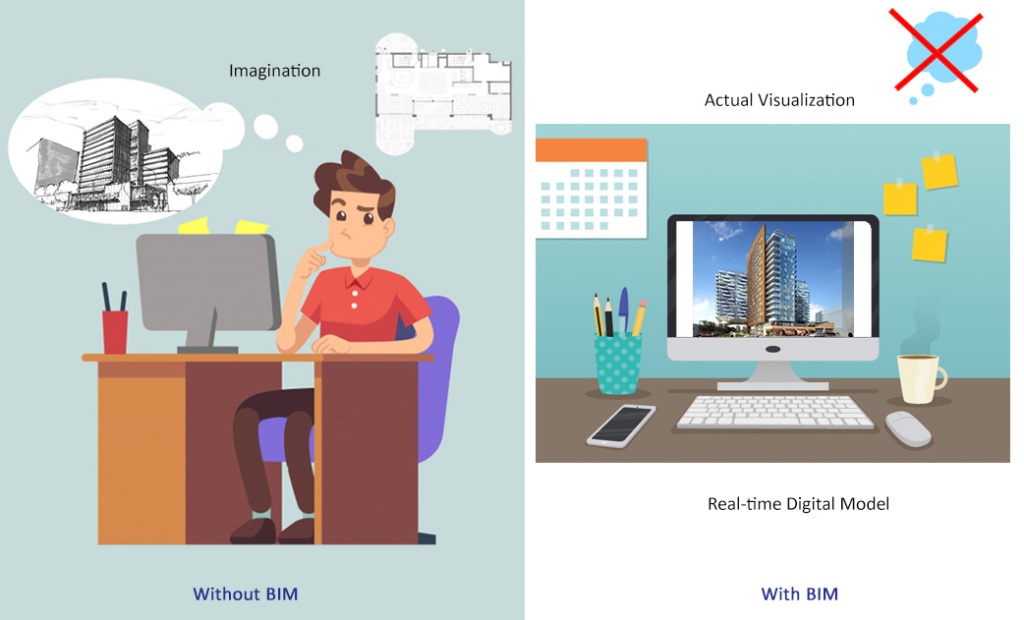
BIM adoption helps in visualizing entire project digitally before construction. There is no misunderstanding between imagination by the client and what architect or any designer wants to portray.

2. Collaboration

It helps in integrating model by all disciplines into one single model. It helps in visualizing project as a whole.

3. Change Management

If change is done by one discipline is sent as notification/mail to all other assigned to make respective changes as per new design. It is easier to understand and visualize. By this changes can be done virtually without conducting a physical meeting for each change or by sending mails separately to each discipline.

4. Management

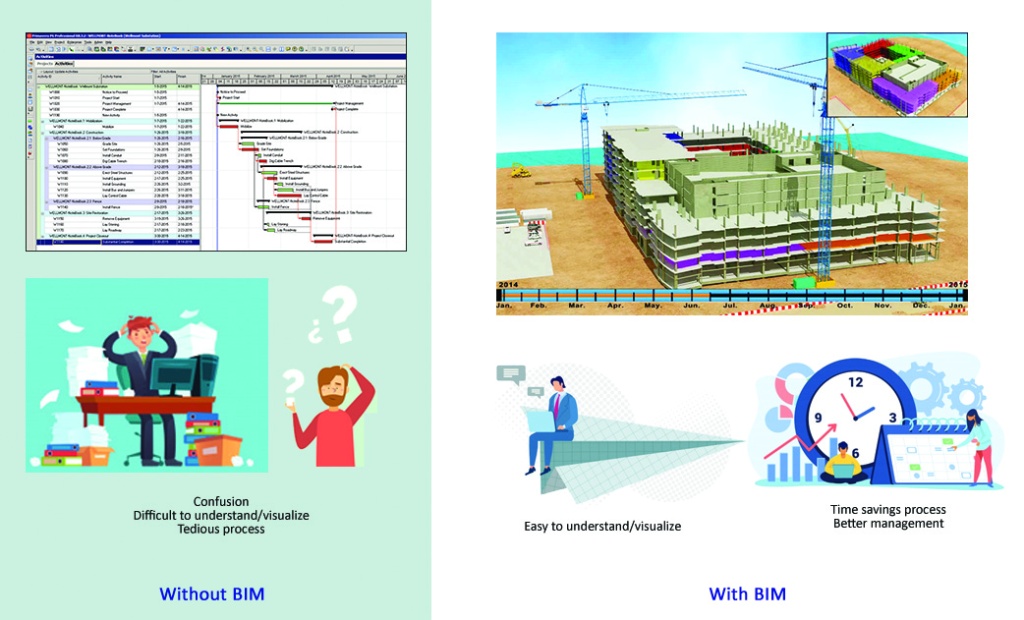
It is easier to understand and visualize entire construction flow of the project until completion. It is easy to monitor and control in 3D model what was planned then what was completed.

Graphical representation also helps in understanding various stakeholders the progress of the project.

5. Quantification & Costing

By BIM adoption accurate quantities can be estimated before actual execution of the project which reduces delay in project due to cost overruns. It helps in efficient cost planning and including lean, value engineering at initial stage itself.

6. Clash Detection

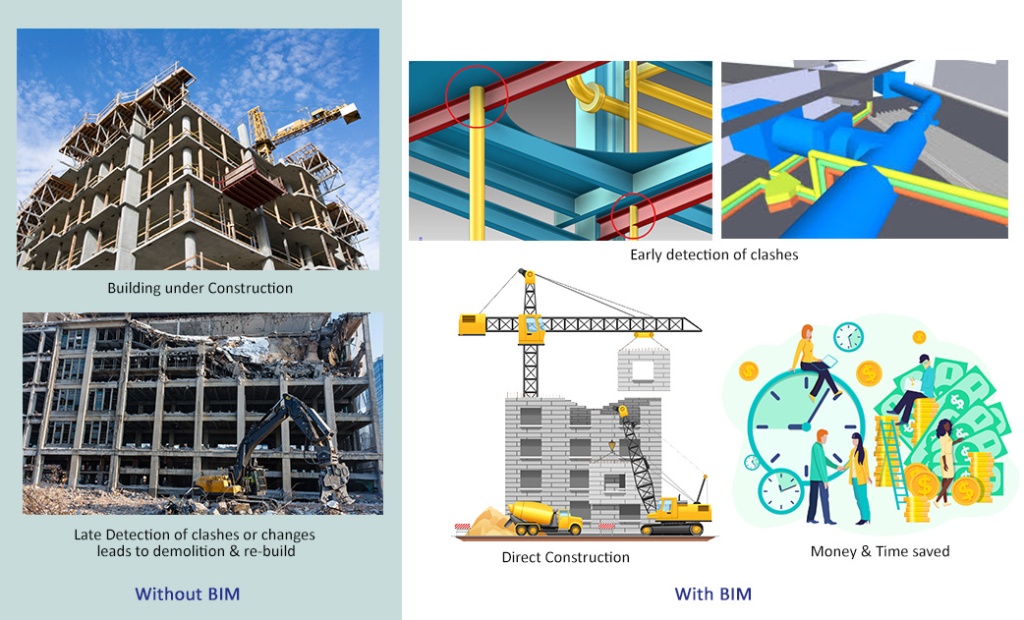
It helps in identifying any clashes between each discipline design rather than realizing it during construction which leads to demolition and again constructing those parts which leads to time, money, materials wastage; increased project schedule & cost.

7. Facility Management

It helps in keeping track when any part of project have to serviced notifies about it beforehand. It also helps in managing data whichever is required during operation stage of building.

“It is a myth BIM Implementation will take away jobs of certain disciplines”

BIM helps in efficient & effective planning, transparency, monitoring, controlling, managing the entire project from initiation till entire life-cycle of project. It is helpful to each stakeholder involved client, investors, insurers, architects, engineers, various consultants, masons, government body, end user, etc.

It helps in:

  • Saving time (On time completion/ no delays)
  • Efficient Cost Planning (no cost overruns)
  • Data Management
  • Construction Management
  • Efficient Collaboration
  • Better Visualization for all stakeholders
  • Effective Change Management
  • Analyzing various analytical aspects
  • Helps in adopting sustainability features & analyzing
  • Helps in facility management

BIM TOOLS


BIM Tools are softwares which help implementing BIM in any construction project.

In following tools are segregated in different categories of workflow though some tools can be used in many categories.

(By clicking on tools name it will take to tool website where you can download free trial or purchase tool, videos give brief overview of tool)

Category 1: BIM Execution Planning Tools

Plannerly

Category 2.1: Modeling Tools

Rhino

Bentley MicroStation

Mostly used for infrastructure projects

Category 2.2: Structural Modeling

Category 3: BIM Content/BIM Objects

For implementing BIM for the project it requires BIM families or BIM objects which have all specifications along.

MagiCAD

Mainly for MEP solutions

Category 4: Algorithmic Aided Design (Modeling)

Category 5: Performance/Analysis Tools

Autodesk Green Building Studio

Used with Autodesk Revit

Trimble- Sefaira

Used with SketchUP

Ladybug

Used with Dynamo & Grasshopper